
Surprising fact: with iOS 17 I can turn a cut-out subject from any photo into a playful sticker in seconds — and those stickers sync across my iPhone, iPad, and Mac.
I love that this feature lives right inside my Photos and Messages apps. I long-press a subject in a photo, pick Live Sticker or create one in Messages, and the system traces edges for a clean cutout. Then I drag the new sticker into a conversation or drop it onto a message bubble for extra personality.
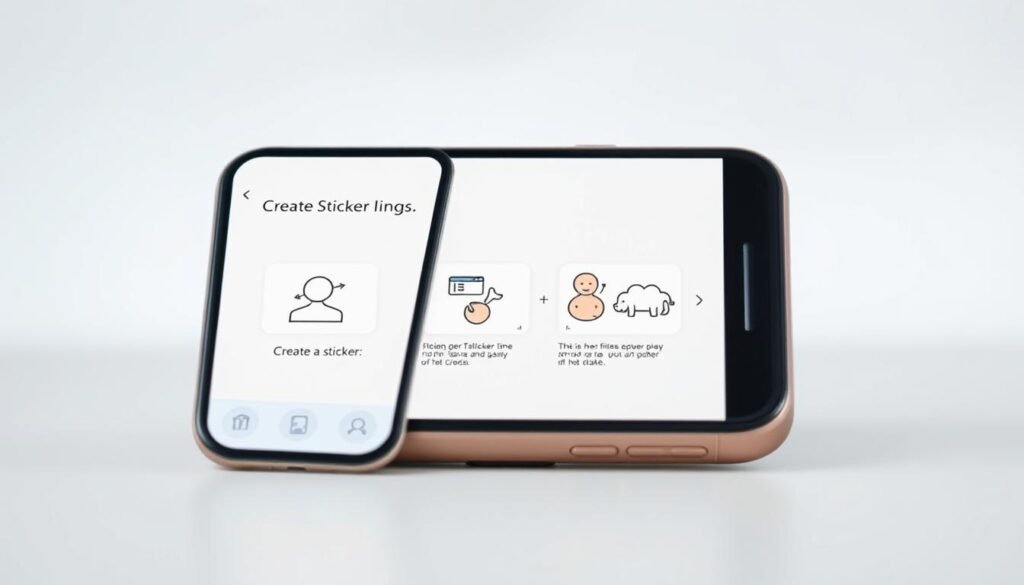
In three quick steps I pick an image, extract the subject, and save it so I can reuse it from the Sticker drawer. I can add Outline, Puffy, Comic, or Shiny effects and even loop animation from Live Photos. These small tricks help my images look sharp and make stickers easy to find when I want them.
Key Takeaways
- iOS 17 lets me create stickers from photos without a third-party app.
- Long-press a subject in Photos or use the Messages sticker tools.
- Stickers sync via iCloud to my other Apple devices.
- Effects and Live Photos allow animated, styled stickers.
- I can drag and drop stickers onto message bubbles for flair.
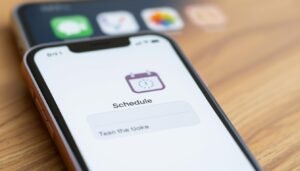
What I’m Covering and Why Stickers Are Awesome in iOS 17
I’ll walk through what this guide covers and why stickers in iOS 17 feel like a tiny creative upgrade.
What I’ll teach: the exact step-by-step way I make stickers, how I apply effects like Outline or Shiny, and the fastest way I send one in a message or drop it onto a conversation bubble.
I’ll explain why this feature is a real upgrade: instead of generic packs, I can turn people, pets, or objects from my photos into personal images that match my style.
Live Photo support is a standout. I can craft a subtle animated sticker from one dynamic shot and it pops inside messages without any third-party app.
Workflow preview: I create stickers inside Photos by long‑pressing a subject or inside Messages via the emoji and sticker icons and the “+” button. New items land in my Sticker drawer and sync across iPhone, iPad, and Mac for one tidy collection.
Finally, I’ll cover organization and tips for choosing the best subjects so edge detection gives clean cutouts and fewer edits. For a practical walkthrough, check this guide: make stickers in iOS 17.
Before I Start: Requirements, Updates, and the Best Photos to Use
My first step is to ensure the phone is updated and ready for clean cut‑outs. I make sure I’m running iOS 17, since this feature only works there. If I’m not current, I open Settings > General > Software Update and tap Download and Install.
I also confirm my device is supported. Compatible models include iPhone XR and later, plus iPhone SE (2nd and 3rd gen). Once the update is installed the feature appears in Photos and Messages.
- I double‑check software first: make sure iOS 17 is active on my phone.
- I pick photos that are sharp and well lit so subjects stand out against the background.
- I avoid busy scenes; simple backdrops reduce stray edges when I extract a subject.
- I prefer expressive poses and high resolution images so fine details like hair render cleanly.
- I crop or zoom when needed so the subject fills the frame and I don’t grab unwanted things.
Quick tip: better inputs save time later. For a short walkthrough that complements these steps, I follow this quick guide.
How to make a sticker on iPhone in 3 easy steps

A clean cutout begins by picking a clear subject inside my Photos library. Below I walk through the fast paths I use: one that starts in the Photos app and one that begins in Messages. Both end with the same saved result so I can reuse stickers anytime.
Step one: Choose a photo in the Photos app and long‑press the subject
I open the photos app, pick the image I want, and press and hold on the subject until a glow traces the edges and a small menu appears.
If the subject is small I pinch to zoom first so the cutout is cleaner.
Step two: Tap Live Sticker or Add Sticker to save it to my Sticker drawer
When the menu pops up I tap Live Sticker or the Add Sticker option and the item lands in my sticker collection instantly.
If I only need it once I use Share and send the image without saving.
Step three: Create it right inside the Messages app with the emoji/sticker icons
I can also open a thread in the messages app, tap the emoji icon, then the Stickers icon, tap the “+”, choose my photo, and tap add sticker to finish.
Both paths support Live Photo sources and can make animated stickers automatically.
| Action | Where | Quick note |
|---|---|---|
| Long‑press subject | Photos app | Glow shows correct selection; pinch to zoom if needed |
| Tap Live Sticker / Add Sticker | Photos menu | Saves to Sticker drawer for reuse |
| Create via Messages | Messages app | Emoji > Stickers > “+” then tap add sticker |
How I Customize Stickers with Effects and Live Photo Options

Right after I save a cutout, I can tweak its look from a small menu. I tap Add Effect and preview the styles until one fits the mood.
The choices include Outline, Puffy, Comic, and Shiny. I use Outline for bold separation. Puffy adds a soft 3D feel. Comic gives playful shading, and Shiny brings reflective pop that draws the eye.
If the source was a live photo, iOS enables animation by default. I like motion for quick reactions, but I can toggle animation off in the editor if I want use a still image instead.
- After saving, tap Add Effect from the menu and preview each option.
- Open the drawer later, long‑press the item, choose Edit Effect, pick a style, then tap Done.
- I keep one or two variants—for example, Outline and Shiny—so I have the right tone at any time.
I balance effect intensity with clarity so the cutout reads well at small sizes. That simple habit saves edits and keeps my set consistent across chats.
Using and Sending Stickers in Messages on iPhone, iPad, and Mac
Sending stickers feels instant once I know where the emoji and sticker controls live in Messages. I open the messages app, tap the emoji icon, then the Stickers icon and the Frequently Used row appears on the left.
If I want one quickly I tap a sticker and it drops into the text field. For my full set I tap the Stickers icon on the lower right to open the drawer and scroll until I find the image I want.
iPhone and iPad
On these devices the flow is the same: open a conversation, tap the emoji panel, then select stickers. Tap the item to insert it or long‑press to drag it into the thread.
Mac
On Mac I click a thread, open the app drawer, choose Stickers, and click my pick to send. The experience matches the messages app so switching devices stays natural.
Drag and placement tricks
With iOS 17.2 I often long‑press a sticker in the drawer and drop it on a specific message bubble. Multiple stickers can layer on one message for a fun effect.
- Tip: watch placement and size so the sticker doesn’t hide important text.
- Tip: animated stickers from a live photo still work when dragged onto bubbles.
- Tip: use the icon left of the text field to open the app drawer fast when switching tools.
How I Organize, Reorder, and Delete Stickers in the Sticker Drawer
A neat drawer makes finding favorites effortless mid‑conversation. I keep the process simple so I waste less time scrolling and more time replying.
Rearrange my favorite items for faster access
I open the Sticker drawer, long‑press any sticker, and tap Rearrange. Then I drag items until my go‑tos sit at the front.
I group similar stickers together so I can quickly select stickers I use for the same reactions. When a new favorite appears, I promote it to the top row so it is one tap away.
Remove things I no longer want use
To delete, I long‑press a sticker in the drawer and choose Delete. While rearranging I also tap the “‑” button to clear duplicates or old designs.
If I’m in the app drawer via the + icon by the text box, I find Stickers, long‑press, and pick Remove so I can tidy up without leaving the thread.
- I review my collection periodically and archive things I don’t want use.
- I watch how often I tap each item and promote those that save me time.
- Small, regular tweaks keep my stickers iphone setup fast, clean, and fun.
Conclusion
I can grab a person or object from any photo and have it ready in messages in seconds. My quick flow is clear: open the photos app, long‑press the subject, then add sticker so it appears in my messages app instantly.
Pick subjects with a simple background for clean edges. I test Outline and other effects, then tweak later if needed. Everything syncs across my phone, iPad, and Mac, so I can reply from wherever I am.
I keep the drawer tidy, promote favorites, and use the icon left of the text field when I need a fast reaction. Practice helps—create two or three today and tap add sticker in a chat to build a personal set that fits my style.