
Surprising fact: I found that nearly one in four lost phones can be recovered when location features were already enabled.
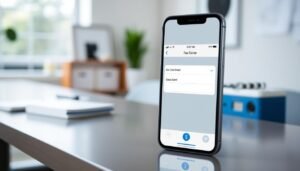
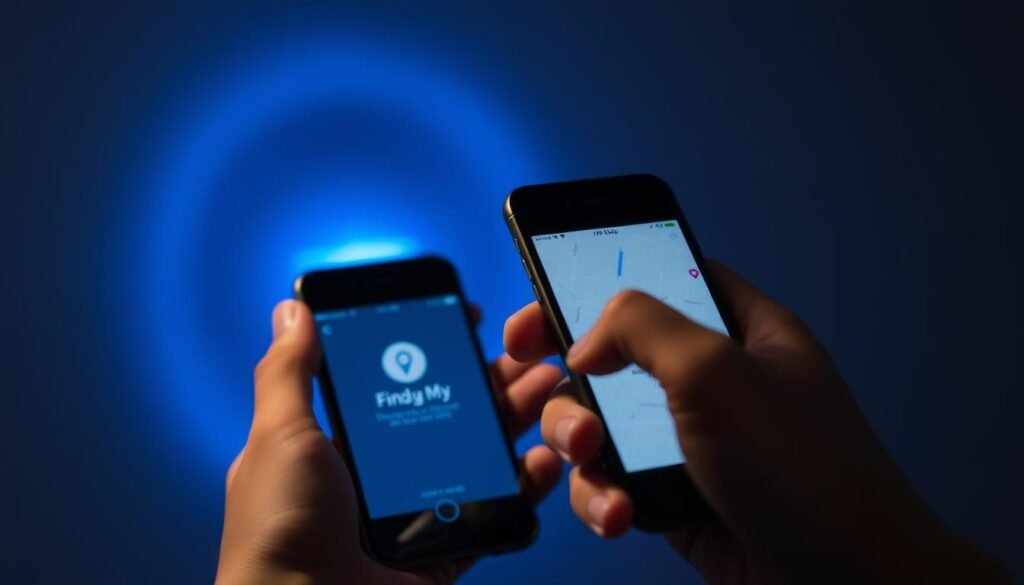
I want quick, calm steps I can use from any browser or device. If I remember my Apple account, I can sign in at icloud.com/find and see my phone on a map. That view often gives options like Play Sound, Lost Mode, or Erase when Location Services were on earlier.
I also use Google Maps for Timeline history or live Location Sharing if I set that up. Trusted third‑party family apps, such as AirDroid Parental Control, add features like geofences when installed with consent on both devices.
My priorities are clear: verify account access, protect privacy, and pick the quickest method available. I plan actions I can take at once—sound, lock, or erase—and then follow the safety steps for recovery.
Key Takeaways
- I can use Find My on the web for a fast live location when I sign in with my Apple ID.
- Google Maps offers Timeline and Location Sharing if those were enabled beforehand.
- Third‑party apps add geofencing and cross‑platform tracking when both devices agree.
- Keep privacy and safety first: use Lost Mode and avoid confronting anyone in person.
- GPS, battery, and connectivity affect location accuracy, so act quickly but carefully.
What I do first when my iPhone goes missing
When I realize my device is gone, I act calmly but quickly to gather location info. I call my phone and walk around my home or workspace while listening for a ringtone.
If it is online, I sign in using another device and open Find My to see the current location. If it is offline or the battery died, the map shows the last known location and that updated clue guides my next steps.
I switch on Lost Mode so the lock screen displays a custom message and a call‑back number. That option also forces a passcode and helps protect my data while someone can contact me.
- I note the battery level and recent places I visited to retrace my path.
- I ask a trusted friend if I shared my location with them in the app and check Google Maps sharing if needed.
- I document times, places, and actions so carriers or law enforcement have clear details if I need help.
Essential setup so I can find my iPhone fast
I set up a few simple toggles now so I can find my phone without panic later.
I open Settings, tap my Apple ID, then iCloud, and choose Find My iPhone. I turn on both Find My and Send Last Location. This makes Apple receive the last location just before the battery dies.
Keep Location Services enabled
I leave Location Services on in Settings so GPS gives an accurate location. Good location data helps the map show my device precisely.
Have my Apple ID and password ready
I confirm I’m signed into my account and that I remember my apple password. I also set two‑factor authentication and make sure my device name is clear in the list.
Check menus, version, and a quick run‑through
I review the menu and screen prompts in the app so toggles are obvious. I check my iOS version and update when convenient. Then I practice: sign in, view the map, and confirm the iphone location once so I’m ready under pressure.
For full official steps, I follow Apple’s guide: Locate a device.
How to track an iPhone
I rely on a simple app or web sign‑in when I need an immediate location update.
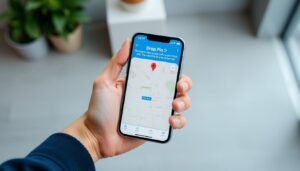
Using another device I open the Find My app or visit icloud.com/find in a web browser. I sign in with my Apple ID and apple password, then pick my device from the list to center the map and view the current or last known location.
Key actions on the screen
At the bottom of the menu I see three main actions. I tap Play Sound when the phone is nearby. I enable Lost Mode to lock the phone, show a custom message and callback number, and keep following any movement in mode.
I choose Erase iPhone only if recovery is impossible, since that removes future tracking and local data. If the phone is offline or the battery is low, Find My shows the last location and, on newer iOS versions, the Find My network and GPS can still help.
Finally, I sign out on shared browsers and review the menu labels so I can move quickly when it matters most.
Track my iPhone with Google Maps: Timeline and real‑time Location Sharing

When Find My lacks recent updates, I check Google Maps for past routes and live sharing. The Maps app can give a different view of where my device has been and where it is now.
Timeline: viewing past location history on the map
I enable Location Services and Location History in Google Maps so Timeline builds a clear record. Then I open the mobile Timeline and review the route for the day.
This historical data helps me compare places on the map and narrow likely spots I left the phone.
Real‑time Location Sharing: seeing live position from another device
I share my live position with a trusted friend or account on the app. From any browser or another device I sign in with the same Google account and the map shows the live iphone location when sharing is active.
Privacy, battery, and settings I double‑check
Before I rely on this method, I confirm permissions, battery optimizations, and background updates so data stays updated. I limit sharing duration and only include people I trust.
“I use Timeline and live sharing alongside Find My for redundancy.”
- I keep Timeline on the mobile app since the web Timeline may change.
- I check the screen settings for sharing and background location.
- I use this method with Find My to improve chances of recovery.
Using third‑party family locator apps to help locate an iPhone
A cross‑platform family locator can fill gaps when built‑in tools have limits. These apps offer an extra method for real‑time location, history, and alerts when set up properly.
I pick a reputable apps provider that supports both iOS and Android so each device pairs cleanly. I install the Android app and the iPhone companion, then follow the on‑screen setup to bind devices and grant continuous location permission.
Pros, cons, and privacy considerations before I install
Pros: real‑time updates, geofences, history, and alerts. I use geofences to get a number of useful notifications when a phone enters or leaves home or school zones.
- I weigh the method’s benefits against subscription costs and battery use.
- I ensure I have consent if I plan to track location for someone else and store login details securely.
- I check each screen for battery and background access so the device reports often and reliably.
Final note: I keep these apps as a backup to Find My and Google Maps, not a replacement. For example, AirDroid Parental Control needs the Android app and the iPhone companion (AirDroid Kids) and permission on both devices before it can show real‑time location, set geofences, and send alerts.
Extra ways I help locate a nearby iPhone

If I think the phone is close by, my Apple Watch often finds it faster than any app. It feels immediate and saves me from wandering the house blind.
Ping my iPhone from Apple Watch (sound and LED flash)
When my watch and device are paired over Bluetooth or the same Wi‑Fi, I swipe up and tap the ping icon. That will make the phone emit a clear sound even if the ringer is silent.
I can tap‑and‑hold the ping so the phone’s LED flashes. This helps me spot the phone in dark corners or under cushions.
Quick tips:
- I use my Apple Watch to play sound on my phone when it is likely at home or at work.
- I check the control screen, swipe up, and tap the icon at the bottom.
- I keep things quiet so the sound stands out, and I move room by room while listening for changes.
- I confirm connection and that location services are updated, then repeat the ping until I find it.
“The ping and LED flash saved me from tearing the couch apart.”
Recovery steps, safety, and privacy best practices
I act fast and clear-headed, starting steps that protect my data and increase the chance I get the phone back.
Lost Mode locks the device, shows a custom message, and displays a reachable number on the lock screen. I craft a short message with a local callback number so a good Samaritan can contact me without accessing personal files.
Lost Mode message, contact number, and tracking updates
I enable Lost Mode and watch location updates carefully. I take screenshots of changes so I have a time-stamped record of any new location info.
- I keep the menu visible and check the latest location the app reports.
- I avoid confronting someone else and share updates with authorities instead.
- I use the official guide for any step I’m unsure about: Find My and Lost Mode instructions.
When I choose Erase iPhone and how I protect my data
Erasing wipes local data and stops further location reporting, so I only use that mode if recovery seems impossible.
After a wipe, I change my Apple ID password, review privacy settings, and remove the device from my account when it’s appropriate.
Contacting my carrier and law enforcement safely
I call my carrier to suspend service and flag suspicious charges. Then I file a police report with the last seen spot, device details, and any identifying numbers I have.
I never try to retrieve the phone myself. I give authorities the location information and screenshots so they can act safely.
| Action | Why it matters | When I do it |
|---|---|---|
| Enable Lost Mode | Locks device and shows message with a number | Immediately after loss |
| Monitor location | Gives updates and evidence for reports | Continuously until resolved |
| Erase iPhone | Protects sensitive data but stops tracking | If recovery is unlikely |
| Contact carrier & police | Stops service and starts an official record | After initial tracking and screenshots |
Conclusion
My go‑to plan focuses on quick actions, account safety, and fallbacks if one method fails. I open Find My first to find iphone, use Play Sound when the phone is near, and enable Lost Mode for protection. strong,
I set up Find My and Send Last Location in advance, confirm Google Maps sharing or Timeline, and keep a reputable family locator ready as a backup. I act from any browser or device and keep my apple password and other passwords updated after recovery.
These simple views and a short checklist help me stay calm and follow the best method for recovery, improve my iphone location odds, and keep my data secure.