

Did you know that most iPhone upgrades finish in under an hour with the right method, while cloud restores can take several hours on slow Wi‑Fi? That gap changes how I plan a move to a new iPhone.
I’ll walk you through the three Apple‑supported paths I use: Quick Start device‑to‑device during setup, iCloud backup and restore, and a computer backup/restore via Finder or iTunes.
I explain each method step by step so you know when to keep both devices nearby, when to wait, and when sign‑ins are required. I also point out the key screens you’ll see, like the Apps & Data screen and the on‑screen animation for Quick Start.
Expectations matter: Quick Start or Finder often finishes in 15–60 minutes depending on how much information you have. iCloud can run much longer over slow Wi‑Fi, so I suggest planning an evening if you have a big photo library.
Key Takeaways
- I compare Quick Start, iCloud, and computer backups so you can pick the best way.
- Keep both devices charged and signed into the same Apple ID before setup.
- Quick Start is fastest when both devices are nearby and on recent iOS.
- Use encrypted computer backups to preserve Health and Activity data.
- Expect 15–60 minutes for device‑to‑device or computer restores; iCloud may take longer.
What I consider before I transfer data to a new iPhone
I run a short checklist before I start. That step keeps the setup quick and avoids mid‑process surprises.
Battery and sign‑ins: I make sure both the old iphone and my new iphone are charged above 50% and on reliable Wi‑Fi. I verify my Apple ID, passcode, and any 2FA codes are available so apps and purchases restore smoothly.
Backup choice and storage: I check iCloud storage and decide whether a cloud backup or a local, encrypted Finder/iTunes backup best suits my needs. If I need Health and Activity information, I pick an encrypted local backup or iCloud with health enabled.
Housekeeping: I delete duplicate files, unused apps, and large videos I don’t need. That shortens transfer time and shrinks the backup size.
| Need | Quick Start | iCloud | Computer Backup |
|---|---|---|---|
| Speed | Fast (15–60 min) | Variable (depends on Wi‑Fi) | Fast if local |
| Includes Health | No unless using encrypted restore | Yes (if included) | Yes (if encrypted) |
| Best when | Both devices nearby | Wireless prefered | Low iCloud storage or slow Wi‑Fi |
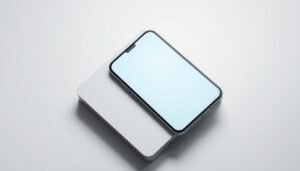
Use Quick Start for a seamless iPhone‑to‑iPhone transfer
Quick Start is my go‑to when both devices are nearby and updated. It needs the old device to run iOS 11 or newer and uses Bluetooth plus Wi‑Fi to link the phones.
What I check before setup
I make a quick checklist: both phones charged, Bluetooth on, same Wi‑Fi, and my Apple ID password ready. Keep both devices plugged in through the process.
My step‑by‑step Quick Start process
- Turn on both phones and pick a language on the new phone.
- Tap Continue on the old phone when Quick Start appears and scan the on‑screen animation.
- Enter the old device passcode on the new device and set up Face ID or Touch ID.
- Choose direct device transfer or an iCloud restore; I usually pick direct for speed.
- Leave both phones together and online until the progress finishes.
Timing and what comes over
Typical completion runs about 15–60 minutes, depending on app counts and photo libraries. Most apps, settings, messages, photos, and Apple Watch pairing migrate with minimal fuss.
| Requirement | Need | Notes |
|---|---|---|
| iOS version | Old device iOS 11+ | Both phones should be updated for best results |
| Connectivity | Bluetooth & Wi‑Fi | Place phones side by side and keep networks stable |
| Authentication | Passcode, Face ID / Touch ID | Enter passcode on new device and complete biometric setup |
| Power | Plugged in recommended | Prevents interruptions on long moves |
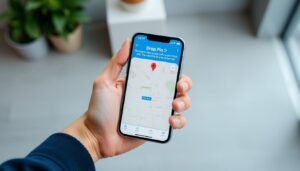
How I transfer data using iCloud backup and restore
iCloud backup is my go‑to when I want a wireless, hands‑off restore. It creates a snapshot on Apple’s servers so the new iphone can pull my content over Wi‑Fi.
Make sure you have an up-to-date iCloud backup on the old iPhone
I first open Settings > [my name] > iCloud > iCloud Backup and tap Back Up Now. Waiting for that finish confirms the backup holds my latest messages, photos, and settings.
Restore from iCloud during new iPhone setup
At the Apps & Data screen on the new iphone I choose the Restore from iCloud Backup option. I sign in with my Apple ID and pick the most recent backup, then keep the device plugged in and on Wi‑Fi while apps and media download.
Tips if iCloud storage is low or Wi‑Fi is slow
- If I see an insufficient storage alert, I decide whether to buy temporary storage or use a Finder/iTunes backup instead.
- I re‑enter my Apple ID password when prompted so services and apps finish signing in.
- With slow Wi‑Fi I plan overnight restores and pause large media so essentials finish first.
“A fresh iCloud backup and a steady Wi‑Fi connection make the cloud restore the simplest way for most moves.”
| Step | Action | Why it matters |
|---|---|---|
| Backup | Back Up Now on old iphone | Ensures latest data is saved |
| Restore | Choose Restore from iCloud Backup | New device pulls settings and apps |
| Storage tip | Upgrade iCloud or use computer backup | Avoids delays when space is low |
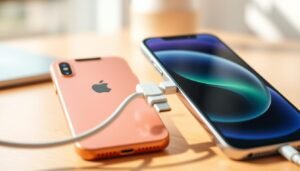
Transfer with a computer: Finder on Mac or iTunes on Windows

A local computer backup gives me speed and certainty. I make a copy on my Mac or Windows PC when Wi‑Fi is slow or my photo library is huge.
On macOS I open Finder, connect the old iphone, select it in the sidebar, and click Back Up Now. On Windows I open iTunes, click the iPhone icon, and choose the same action.
I always check Encrypt local backup so Health, Activity, and saved passwords come over. Without encryption some sensitive items won’t transfer.
Finder on macOS vs. iTunes on Windows: which method I use
- Finder (Mac) and iTunes (Windows) follow the same flow and give a fast local copy that avoids Wi‑Fi limits.
- After the old iphone backup finishes I connect the new iphone and pick Restore Backup and the latest snapshot.
- Keep the phone connected until apps and media finish syncing; some items keep downloading in the background.
Why I choose encrypted backups for Health and Activity data
Encrypted backups preserve Keychain passwords, Wi‑Fi settings, and health records. That is why I always enable encryption before I back up.
“A local, encrypted backup gives me the clearest path for a full and private restore.”
| Step | Mac (Finder) | Windows (iTunes) |
|---|---|---|
| Create backup | Select device in Finder → Back Up Now | Click iPhone icon → Back Up Now |
| Encryption | Check Encrypt local backup (recommended) | Check Encrypt local backup (recommended) |
| Restore | Connect new iphone → Restore Backup | Connect new iphone → Restore Backup |
| Finish | Keep device connected until sync completes | Keep device connected until sync completes |
After restore, I enter my Apple ID password if prompted and spot‑check messages, photos, and a few apps before I trade in the old iphone new one.
how to transfer data from one iphone to another after setup
If your new device is already set up, you can still make the old phone’s content match it by starting over and restoring a backup.
Erase-and-restore path: when I reset the new iPhone and recover from iCloud or iTunes
The cleanest Apple‑supported option is erasing the new device and restoring a recent backup.
I open Settings > General > Transfer or Reset iPhone > Erase All Content and Settings, then follow setup and pick Restore from iCloud Backup or use Finder/iTunes with an encrypted snapshot.
Using third‑party tools without resetting
When I don’t want to erase, I use tools like AnyTrans or iSyncGenius. They let me move selected categories—messages, photos, or contacts—directly between phones.
What does and doesn’t move after setup
Apple’s methods bring apps, messages, photos, and most settings. I still re‑enter some passwords and app sign‑ins for security.
Health and Activity need an encrypted local backup. iCloud Photos redownloads in the background after I sign in.
| Scenario | Best option | Notes |
|---|---|---|
| New device already set up | Erase-and-restore | Mirrors old iphone exactly if backup is current |
| Keep current setup | Third‑party tool | Selective move without wiping |
| Health & passwords | Encrypted computer backup | Guaranteed presence after restore |
Tip: If you want a guided Apple article, see transfer data from iPhone for extra detail.
Move only what I need: AirDrop and other selective transfer methods

When I only need a few photos or a couple of documents on my new phone, AirDrop is my quickest option.
Quick setup: I enable AirDrop on both devices, pick Everyone for 10 Minutes or Contacts Only, then select items and tap Share > AirDrop. The receiving device shows an Accept prompt and the items appear instantly.
I use AirDrop for small batches of photos, files, or contacts because it is fast and wireless. It works best when both iphones are unlocked, close, and have Bluetooth and Wi‑Fi on.
When AirDrop works best (and its limits for bulk transfers)
- Fast single items: great for a few photos or a document when I need them right away.
- Not for full moves: it won’t rebuild apps, settings, or large message histories in bulk.
- Large batches: I split big albums into smaller chunks, or I switch to a full backup method for reliability.
- App data: I rely on iCloud sync or an encrypted backup, since the app must be installed on the new device for its content to appear.
Practical tips: Keep both devices nearby, stay on Wi‑Fi and Bluetooth, and toggle AirDrop settings if a device does not appear. When I need step‑by‑step guidance for larger moves, I check a concise selective transfer guide that complements AirDrop use.
“AirDrop is perfect for quick, local sharing — but for complete migrations, use a backup and restore method.”
| Need | Best way | Notes |
|---|---|---|
| Few photos or files | AirDrop | Fast, wireless, no computer |
| Many items or apps | Full backup & restore | Rebuilds apps, settings, and Health info |
| Single contacts or docs | AirDrop or Messages | Good when away from home Wi‑Fi |
My pre‑ and post‑transfer checklist: backups, cleanup, and sign‑ins
I run a short checklist before I begin and a quick sweep after the move. This keeps the new device working and reduces surprises.
Prepare the old iPhone
I make sure the old iphone is updated and I run a fresh backup — iCloud or an encrypted Finder/iTunes snapshot. That preserves Health and passwords.
I clean storage by removing large videos and unused files. This shrinks the transfer and speeds the restore of apps and photos.
After the move
I allow apps to finish downloading and keep the new iphone on power so indexing completes. I re‑add cards for Apple Pay and confirm iMessage and FaceTime work.
I re‑pair my Apple Watch if needed and verify eSIM or SIM activation with my carrier. Then I re‑enter critical passwords and check notification and privacy settings.
“A quick prep and a careful follow‑up mean the new device feels like home the same day.”
| Action | Pre‑move | Post‑move |
|---|---|---|
| Backup | Run iCloud or encrypted Finder/iTunes backup | Confirm restore completed and recent data is present |
| Cleanup | Remove large videos and unused apps | Check storage and finished downloads |
| Accounts & services | Have passwords and 2FA ready | Sign in, verify Apple Pay, iMessage, FaceTime, eSIM |
| Final steps | Organize Home Screen and sign out unused apps | Erase old device only after confirming content on new iphone |
Conclusion
, I wrap up every switch by confirming accounts and a handful of settings on the new device.
I pick Quick Start, an iCloud backup, or an encrypted Finder/iTunes backup based on speed, storage, and privacy. Back up first, have your Apple ID password ready, and keep both devices charged.
If the new one is already set up, I either use erase‑and‑restore for a full mirror or a selective tool when I want only certain files and apps. For a few photos or contacts, I use AirDrop for a quick handoff.
Finally, I sign back into key apps, spot‑check messages and photos, and confirm settings so the data transfer feels complete and the new iphone works like home.